Hands-on experience is an invaluable source of information. Below, a skilled vibration test technician shares some of their notes on performing a vibration shaker test safely.
Safe Work Area
Anyone entering an area with a shaker system should wear proper hearing protection, safety glasses, and safety footwear.
During fixture installation, standing on the shaker presents many hazards, including falling off, slipping on oil, and pinching fingers. Applying grip tape at the locations where technicians may stand is recommended to reduce the risk of slipping. Alternatively, step stools eliminate the need for technicians to climb on the shaker system. Customers and guests should never climb on shakers or attempt to bolt down fixtures due to the risk of falling or improperly attaching fixtures or equipment.

Figure 1. Grip tape on the edge of a shaker.
Equipment Installation
Only a trained technician should install the shaker system to avoid a hazard. Electrodynamic shaker systems use high-voltage AC and DC, and interaction can be dangerous.
Wires, hoses, and ducts running from the shaker to the amplifier should be arranged in a safe location so operating personnel or guests will not trip over or damage them. Using a wire rack system to guide the wires up and over any walkways is good practice. If the lab requires system monitoring, any cables or hoses hanging off the shaker should have the correct strain relief so they do not rub against each other or incur damage. Additionally, cables or hoses should not go under the shaker.
After installation is complete, another experienced personnel should review the set-up and the installation instructions from the system manufacturer. Be sure to inspect for exposed wires. Lastly, apply power to the shaker system and check for proper power inside the amplifier.
Fixture
A thick and sturdy fixture will help transmit the input vibration to the test item without other factors, such as resonant frequencies. If the technician is unsure if their shaker can run the specified test, they should program the test before setting up the shaker system. After the test is configured and programmed, they can enter the system limits into the software and confirm that the shaker is capable.
Learn more: Shaker Fixture Design article
Running the Test
The lab can run a test after the fixtures and equipment are in place. Before powering up the amplifier, they should consult the system instructions provided by the manufacturer or an experienced technician.
After the technician turns on the shaker, they must check that the accelerometers are connected, and the drive is plugged in before turning ON the system gain. After the gain is ON, another experienced personnel should look over the setup and check the following:
- The fixture is tight to the slip table, head, or head expander.
- The load on the shaker is centered. An off-balanced load can misalign the shaker, wearing the parts inside.
- The proper bolt length should be half an inch through the fixture. Bolts that are too long can dimple the bottom of the slip table.
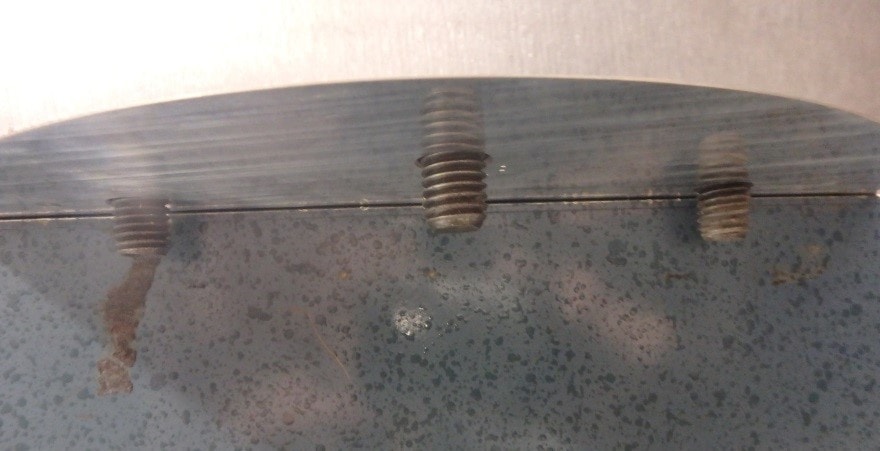
Figure 2. A proper bolt length in a shaker.
- Using all the holes on a fixture will result in better fixture transmissibility, which in turn will result in fewer resonant frequencies on the fixture.
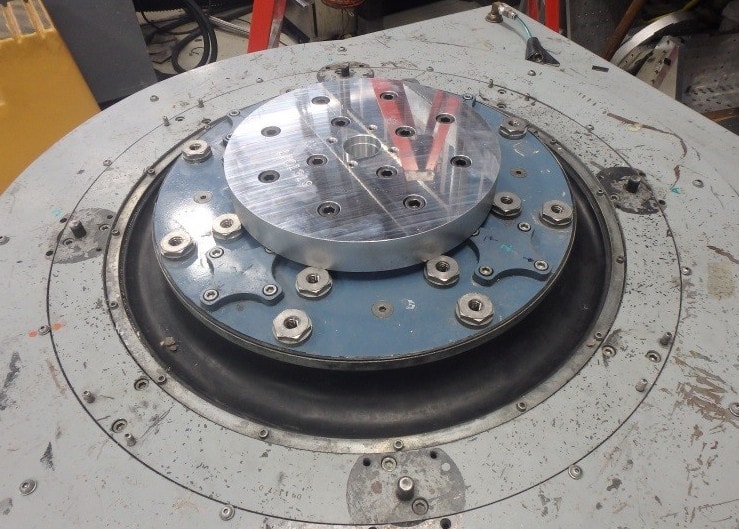
Figure 3. A fixture on the center of a shaker.
- The device under test is secure to the fixture.
- The cables are secure to the shaker and no potential trip hazards are present.
- The control accelerometers are secure and taped down.
- When running a shock test, make sure the control accelerometers are facing the same way or configured to be inverted.
- The control accelerometers should be placed closest to the mounting location of the DUT to the fixture unless directed otherwise.
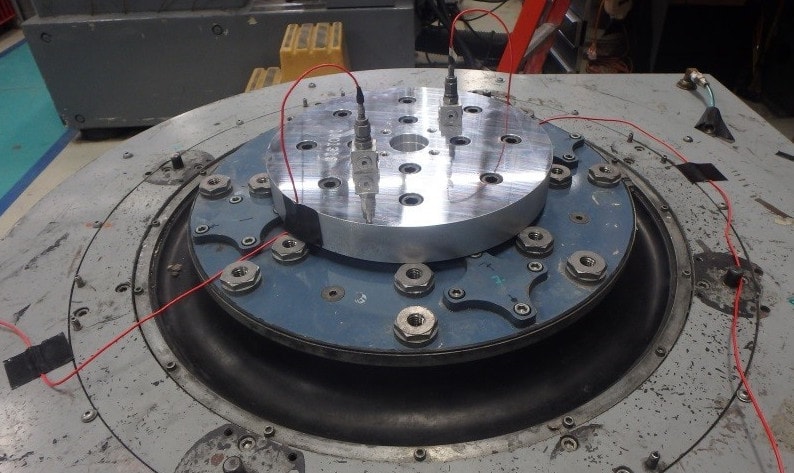
Figure 4. Cables taped (safety loop) near the mounting of the device under test.
- The amplifier has the correct configuration for the test.
- Running the test at full gain is acceptable.
- After the test is complete, bring the gain down before removing the accelerometers.
- The control accelerometers are correctly configured in the software.
- The test profile is correct.
After the checklist is complete, a low-level sine sweep will help verify that the test is safe to run per the specified profile.