Abstract
VibrationVIEW will automatically calculate the third unknown value in a given Random profile when two of the following values are known: G2/Hz for Frequency 1, Slope, G2/Hz for Frequency 2.
Question
A customer had the following random specification and was not sure how to enter the test into VibrationVIEW:
- 0.052 G2/Hz from 80 to 500Hz
- ‐6db/octave from 20 to 80Hz
- ‐6db/octave from 500 to 2,000Hz
- Total 7.4 GRMS
Answer
A random test specification can come in many formats. Vibration Research has taken the best of the formats and combined them for easy test entry in VibrationVIEW.
- Step 1
- Click New Test > Random.
- Step 2
- If the Quick Test option is set as the default, click the Advanced button on the bottom left.
- Step 3
- Under the Table tab, click the Insert button to insert as many lines as there are frequencies in the test specification. In this case, there are four frequencies so we would insert four lines.
- Step 4
- Enter the frequencies from the test specification in ascending order in the frequency column: 20Hz, 80Hz, 500Hz, and 2000Hz.
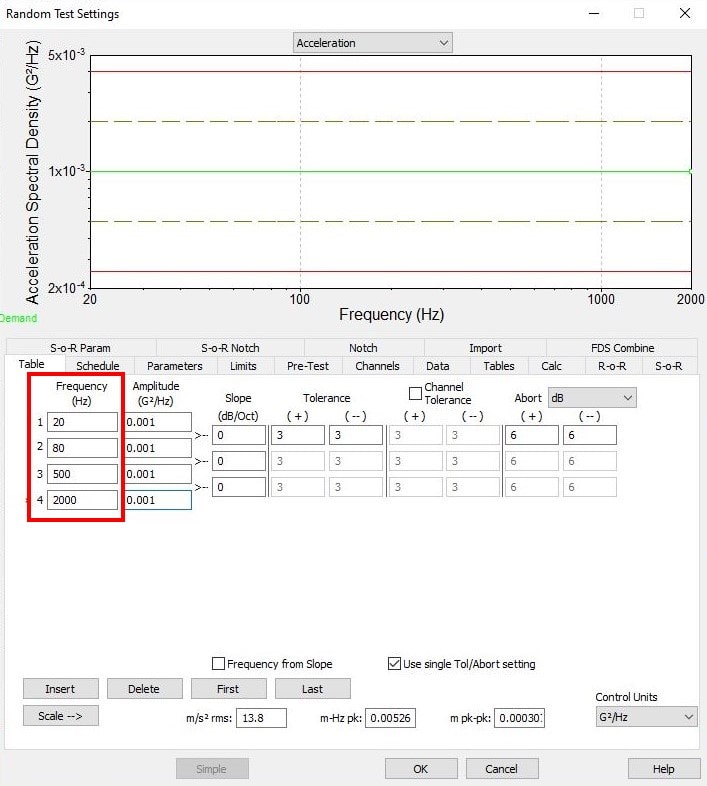
- Step 5
- Now we can begin entering the known G2/Hz values: .052 G2/Hz at 80Hz and .052 G2/Hz at 500Hz.
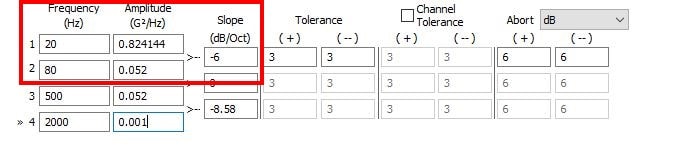
- Step 6
- The click‐order is important to automatically calculate the unknown value. In the screenshot below, notice the triangle formed by the Amplitude and Slope entry boxes.
- Always start in the known amplitude box. In this case, we would click in row 2 (80Hz) column 2 (.052 G2/Hz). Then, click in the second known box of the three boxes formed by the triangle. In this example, we know the slope to be ‐6 from 20Hz to 80Hz, so we would click from the known amplitude box to the slope box and enter ‐6. You will see that the amplitude box for row 1 (20Hz) highlights yellow. After entering ‐6, the yellow box will be automatically calculated.
- This would also work with two G2/Hz values and an unknown slope. You would simply enter in the first known amplitude and then the second. The third box in the triangle will always be auto‐calculated based on the two known values.
- Step 7
- You can verify the test was entered correctly by comparing the G RMS value calculated by VibrationVIEW and the overall G RMS from the test specification. There will almost always be some rounding errors when comparing the values. You can see that the test spec provides 7.4 G RMS and VibrationVIEW calculates 7.402. This is within an expected range given any rounding variations and we can assume that the test has been entered as required.