Abstract
Question
How can you keep a running log of a test?
Answer
In VibrationVIEW, formatted tables automatically save tabular (spreadsheet) data to the workstation computer. Tables can be used with test notes to create a running test log.
Tables
Tables are defined under the Tables tab in the Test Settings dialog. Figure 1 displays the Tables tab for a Sine test.
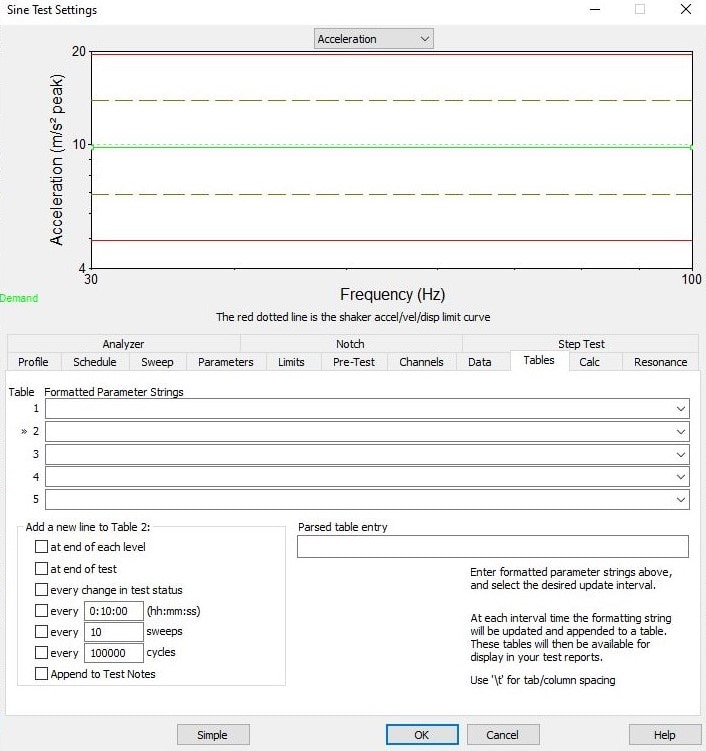
Figure 1. Tables tab for a Sine test in VibrationVIEW.
You can define up to five tables for each test. Table data are generated at specified intervals using user-defined strings of report parameters. The resulting text is stored in a data file. You can include these tables in future reports.
Step 1
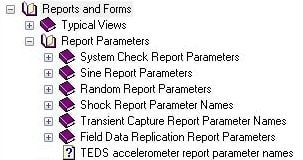
Use the Help Index to find the parameters for the formatted table:
- Select F1 to open the Help Index
- Select the plus (+) icon to the left of “Reports and Forms” to expand the section
- Expand the “Report Parameters” section
- Expand the report parameter section for the relevant test type; the parameters are test-specific
The parameters are formatted as [PARAM:name], where “name” is the formatted parameter name.
Step 2
To set up a running log of acceleration and frequency for Channels 1–3, identify the necessary parameters in the Help Index:
- Acceleration for Channel 1 is [PARAM:Ch1Accel]
- Current frequency is [PARAM:Frequency]
- The key string \t enters a tab and lines the items up correctly in the final document file
- If applicable, include the time when the readings were taken with the [PARAM:TIME] parameter
The resulting format string will look like the following: [PARAM:TIME]\t[PARAM:Ch1Accel]\t[PARAM:Ch2Accel]\t[PARAM:Ch3Accel].
Step 3
Specify how often the software should take the readings with the “Add new line” options below the parameter strings (Figure 2).
Note: Each row (1, 2, 3, etc.) represents a table and has its own update interval settings. If a string of parameters are not updating as specified or do not appear in the test notes, select anywhere in the row to make sure the update settings are correct.
- Click anywhere in row 1. To take a reading every 15 seconds, select the “every (hh:mm:ss)” checkbox and enter 00:00:15. 15s is a shortcut for 15 seconds, 15m for 15 minutes, and 15h for 15 hours.
- Select the Append to Test Notes checkbox. This selection allows for live updates.
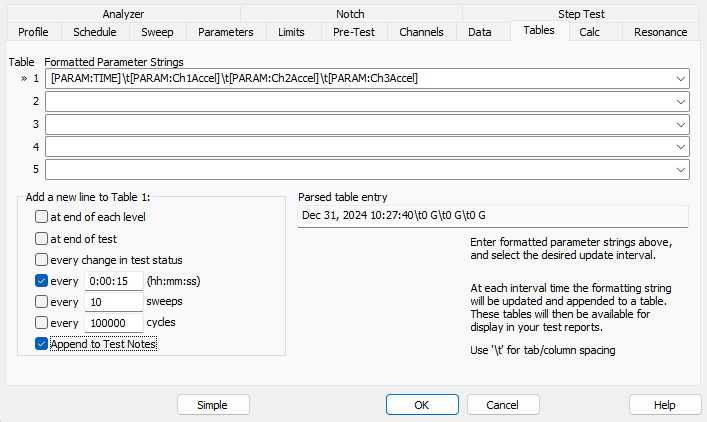
Figure 2. Parameter string with update interval settings.
- If “every (hh:mm:ss)” is selected, the software will replace the [PARAM:] fields in the row with values. If the parameters are valid, the fields will be replaced with the current test values. Select anywhere in the row to display the parameters.
Step 4
Log every change in the test status (Figure 3).
- Click anywhere in row 2. Select the “every change in test status” checkbox. Row 2 will be populated with [PARAM:TIME]\t[PARAM:STOPCODE].
- VibrationVIEW will try to enter a reasonable default whenever possible. Select the”Append to Test Notes” checkbox and select the OK button to run the test. The following screenshots display how the tables should be set up.
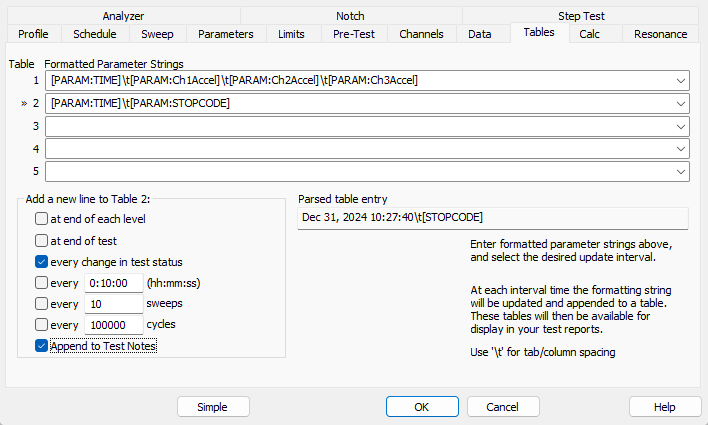
Figure 3. Logging a change in test status in row 2.
Testing the Solution
Run the test and select View > Test Notes. The Test Notes tab will display the parameter readings at the set interval.
Adding Parameter Strings to Reports
You can include the results of parameter strings in reports. VibrationVIEW’s Report Builder uses {DOCVARIABLE} parameters. You can access the report builder by selecting the Report button and selecting a .vvtemplate template file.
To add the formatted parameter strings in Report Builder:
- Select Report > Report Parameters
- The Format Parameter String option is under the Table category; navigate to the parameter
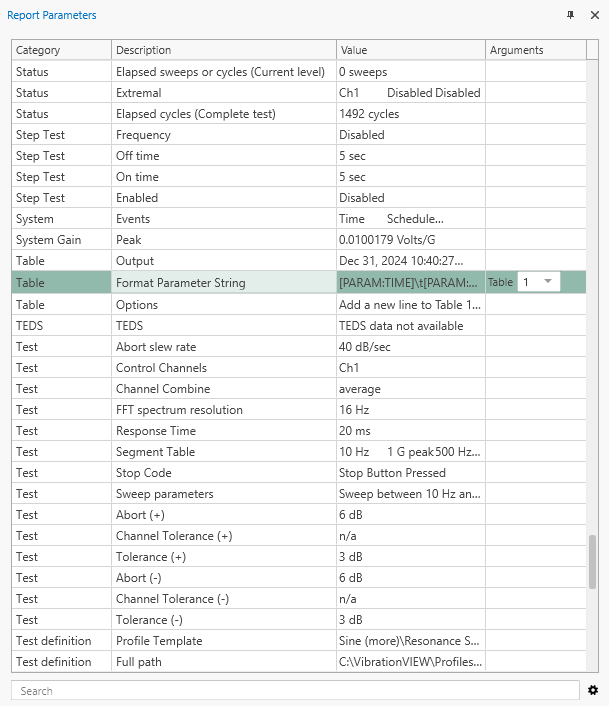
- In the Arguments column, select the table to add to the report (1 to 5)
- Click and drag the parameter to the report
Other Test Notes Hints
- You can type in the Test Notes tab to manually enter test observations
- Press Ctrl+t to add a date and time stamp in the test notes
- You can change the font and line color to highlight specific test notes
- Use the parameter {DOCVARIABLE TESTNOTES} to add test notes to your report