Abstract
You must configure your PC to communicate with the Vibration Research I/O hardware unit in order for the hardware unit to connect to VibrationVIEW. You can do so by setting up a static IP address on the network card connected to the hardware unit.
Question
How do I get my PC to communicate with the Vibration Research I/O hardware unit?
Answer
Setting up a Static IP Address
- Navigate to your PC’s Control Panel.
- Select Network and Internet > Network and Sharing Center.
- Select Change adapter settings.
- Right-click the network card dedicated to the hardware unit and select Properties.
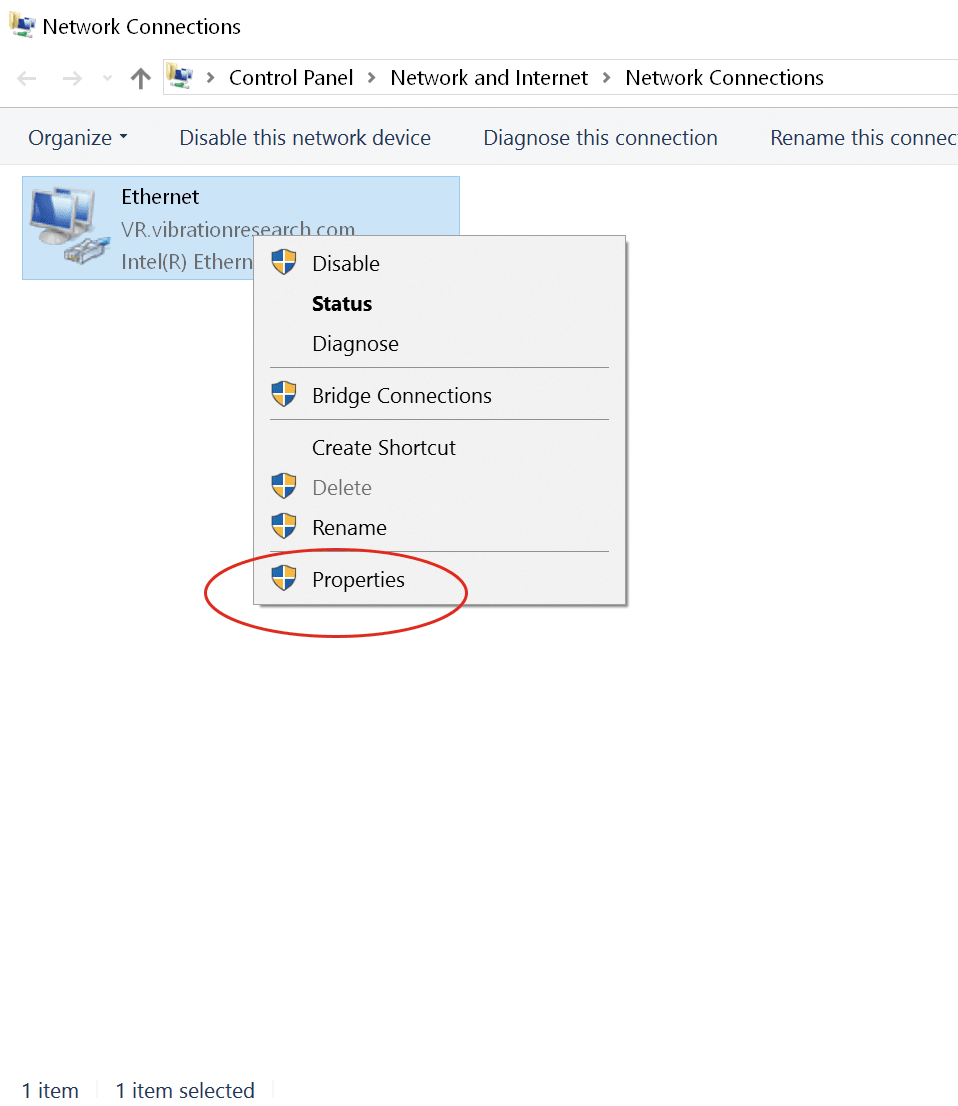
Network Connections dialog.
- In the Properties dialog, enable/check “Internet Protocol Version 6 (TCP/IPv6).” IPv6 connections from VibrationVIEW to the hardware unit can help avoid IP address collisions. Most versions of Windows will configure network cards with IPv6 configuration. Select OK.
The network card is now configured to communicate with the hardware unit.
IPv4
If your network card is unable to use IPv6, continue with the following steps to configure the network card for use with VibrationVIEW.
- In the Ethernet Properties dialog, disable/uncheck all options except “Internet Protocol Version 4 (TCP/IPv4).”
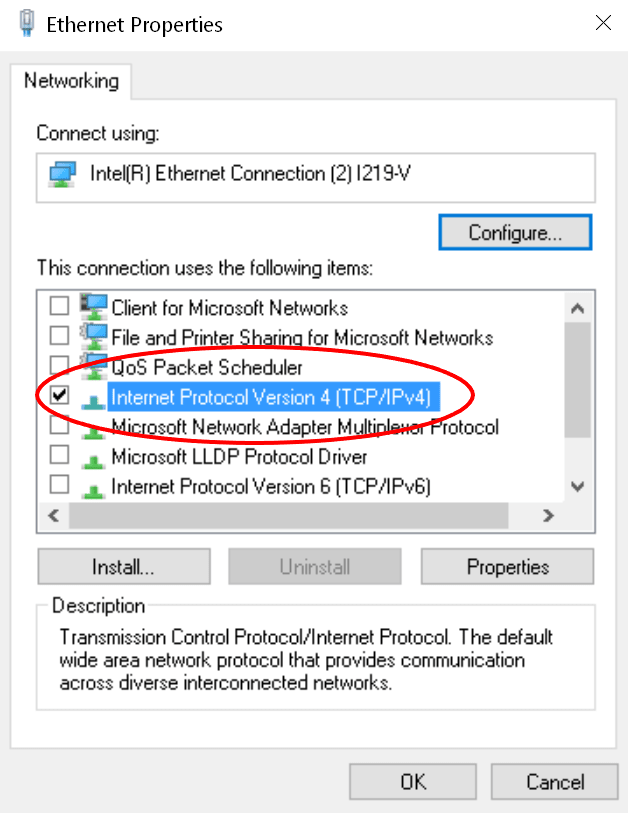
Click to expand.
- Select the Properties button.
- Select the “Use the following IP address” radio button. Assign the IP address to 192.168.3.10 and the subnet mask to 255.255.255.0.
- The IP address can be adjusted if multiple network cards are installed in the computer. Other recommended values are 192.168.2.10 and 192.168.4.10, although any Class C or Class D subnet will work.
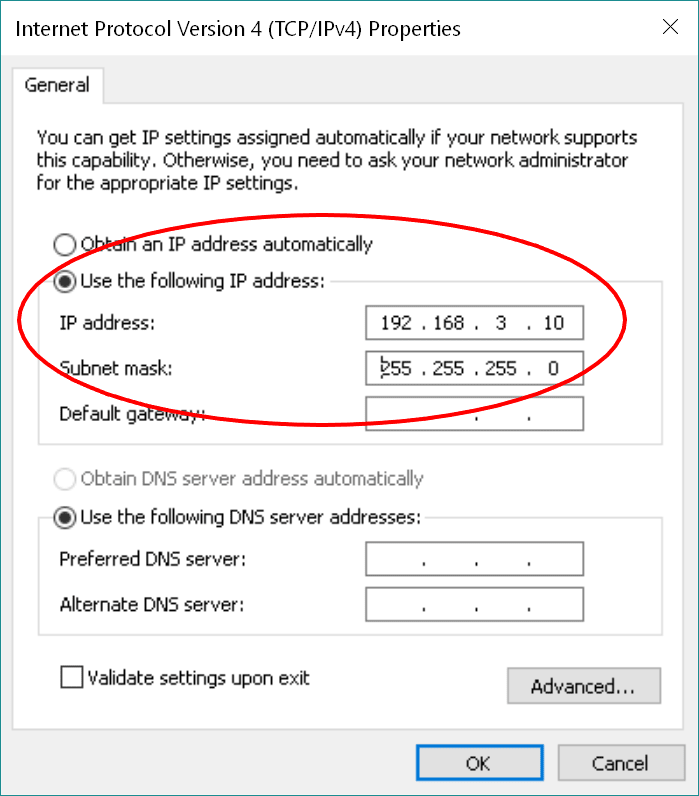
Click to expand.
- Select OK.
- On the Properties dialog box, navigate to the Sharing tab. The “Internet Connection Sharing” option for the connection should be disabled/unchecked. Select OK.
The network card is now configured to communicate with the hardware unit.
Connecting to VibrationVIEW
VibrationVIEW must be configured to use the network connection after the connection is set up.
Configuring VibrationVIEW to the Network Connection
- Start the VibrationVIEW software program.
- Select Configuration > Mode > Controller (v2023.2 and newer). If the controller option is selected or the software is older than v2023.2, select Configuration > Hardware.
- Select the network card you configured on the PC. Typically, it is 192.168.3.10.
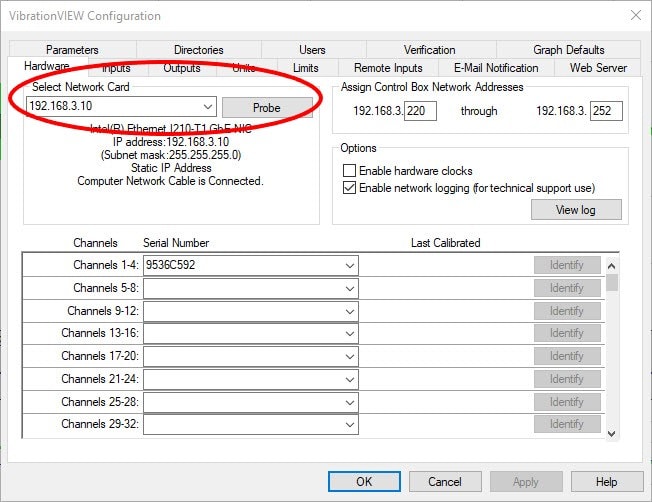
Click to expand.
- Select Probe and then select Apply.
- The hardware unit’s serial number will appear in the drop-down list for Channels 1 to 4 (VR9500 and VR9700) or Channels 1 to 16 (ObserVR1000 and VR10500) after it connects to the computer. Select the hardware unit’s serial number to configure the first hardware unit and, optionally, any subsequent hardware units (in blocks of 4 channels for the VR9500/VR9700 and 16 channels for the ObserVR1000/VR10500).
The software assigns the hardware unit’s addresses from the range listed under “Assign Control Box Network Addresses.” This parameter does not need to be changed.